 :
:ConceptDraw V is a multi-window environment, that allows you to work with several documents at a time. It has a large number of toolbars and floating dialogs which make creating vector drawings, schemes and diagrams convenient and fast.
The built-in scripting language (ConceptDraw Basic) lets you automate working with documents, making it possible to create "smart" shapes or use external data sources for generating a document - such as databases or spreadsheets.
When you launch ConceptDraw for the first time, the Template Gallery dialog comes up. This dialog lets you choose a template, to base your document on. If you don't want to see this dialog at start-up, remove the Show At Startup check. For this Quick Start guide we won't need templates. Click on the Blank document button in the Template Gallery dialog to create a blank document.
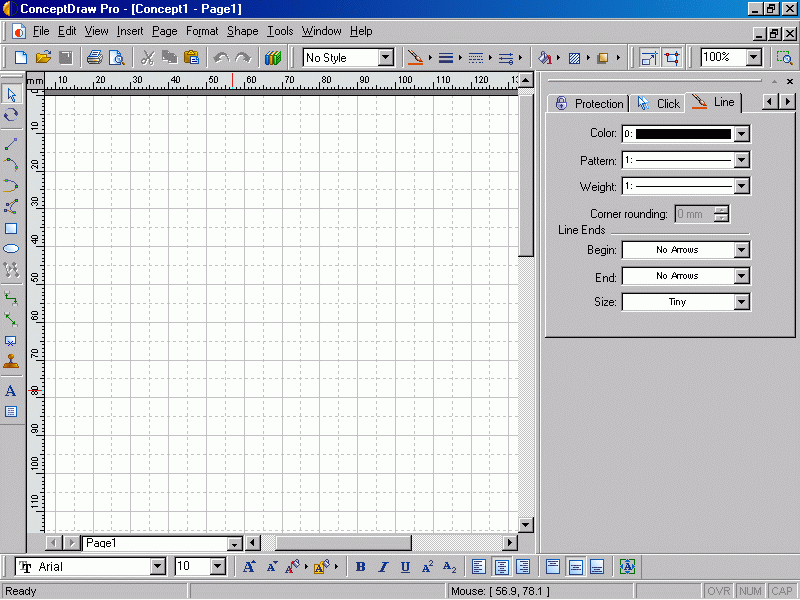
The document window will come up, with the main menus, several toolbars and a black document.
The document window in Windows :
The document window in Mac OS X  :
:

The user can re-arrange and customize toolbars; however, we will use the default toolbar settings for the purpose of this exercise.
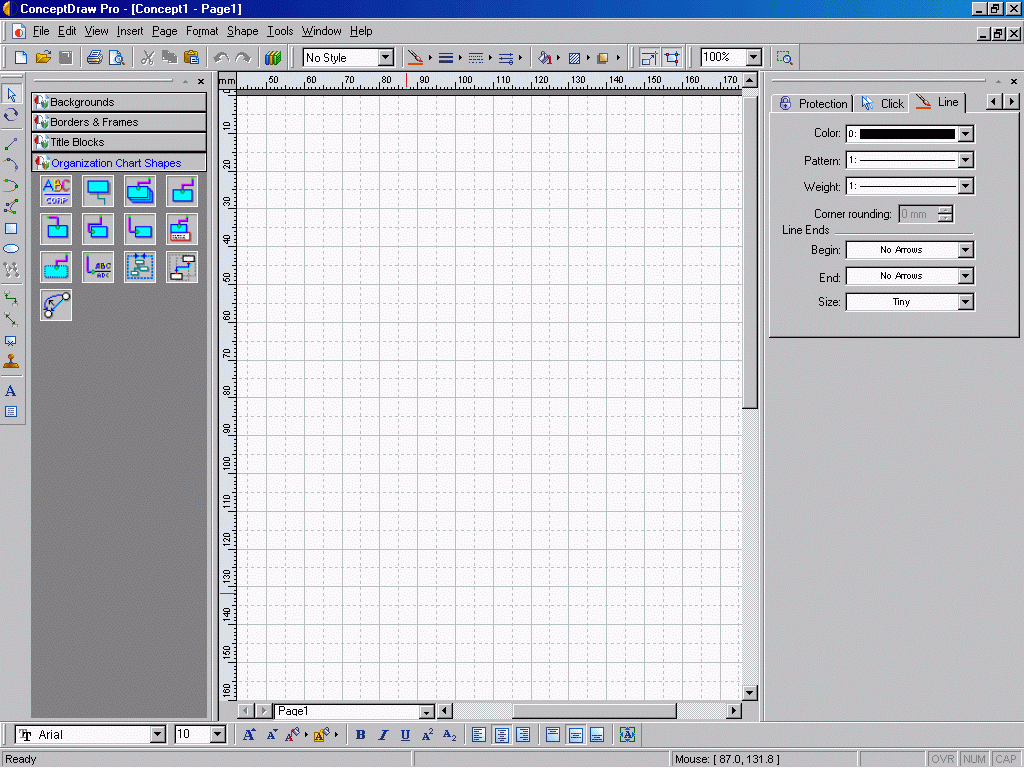
The Drawing Tools toolbar is located in the left part of the document window and contains the main tools for drawing and editing shapes and their text.
At the top of the document window you can see the main program menu and all or some of the following toolbars: Main - for working with document files (opening, saving, printing, copy/paste commands and other), Formatting - for working with line and fill colors and styles, the Snap & Glue toolbar which toggles the Snap and Glue modes on/off, the Zoom toolbar that is used to increase/decrease the zoom level in the document.
The Text toolbar, that controls text formatting of shapes, is located at the bottom of the screen.
By default, the grid is displayed for more convenient and precise drawing. It can be disabled from the View / Grid menu.
 By choosing the Rectangle
tool
By choosing the Rectangle
tool  you can draw a rectangle in the
document, using the mouse. Press and hold down the mouse button, and drag the
mouse across the page to draw a rectangle of the desired size and form. On releasing
the mouse button, the rectangle will appear. To select the rectangle, switch
to the Select tool
you can draw a rectangle in the
document, using the mouse. Press and hold down the mouse button, and drag the
mouse across the page to draw a rectangle of the desired size and form. On releasing
the mouse button, the rectangle will appear. To select the rectangle, switch
to the Select tool  and click somewhere
on the rectangle. To deselect it, click away from the rectangle. To move the
rectangle to some other place, click and hold the mouse button on it, drag it
to the needed location and then release the mouse button.
and click somewhere
on the rectangle. To deselect it, click away from the rectangle. To move the
rectangle to some other place, click and hold the mouse button on it, drag it
to the needed location and then release the mouse button.
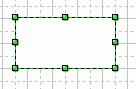
When you are in the select mode, you can resize the rectangle by dragging the corresponding resize handle.
To remove the selected shape, press the Delete key.
If you double-click the rectangle, or press F2 when the rectangle is selected, the text editing mode will turn on. Each shape can have text. The text editing mode will also turn on automatically if you start typing when the shape is selected.
If you press and hold the Ctrl (in Windows) or Cmd (in Mac OS) key when dragging a shape, you will drag a copy of the shape instead of the original shape. You can carry the copy to the needed location and release the mouse button to drop it there.
Besides, the selected shape can be moved with the keyboard (the arrow keys).
If you click on a resize handle of a selected shape, the resize handle will get selected and you can use the arrow keys to move the resize handle and reshape the shape by doing so.
Below you'll find an example of creating a simple diagram in ConceptDraw, using templates and library shapes.
For information about the Template Gallery dialog see Dialogs
- Modal Dialogs - Template Gallery,
about the Drawing Tools toolbar see Toolbars - Drawing
Tools,
about the Main toolbar see Toolbars - Main,
about the Formatting toolbar see Toolbars - Formatting,
about the Snap & Glue toolbar see Toolbars - Snap
& Glue,
about the Zoom toolbar see Toolbars - Zoom,
about the Text toolbar see Toolbars - Text,
about operations on shapes see Shapes - Operations
on Shapes,
about working with text see Text.
ConceptDraw is perfect for drawing organization and workflow charts. This chapter describes how you can create an org chart by using ConceptDraw.
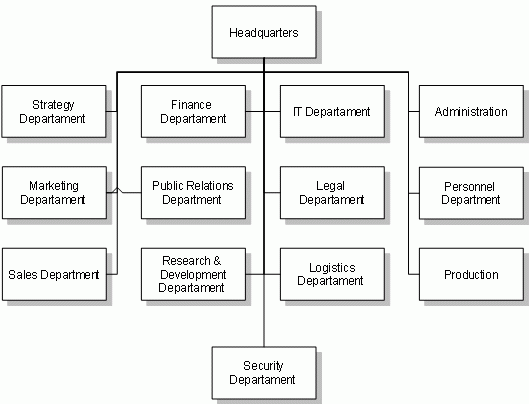
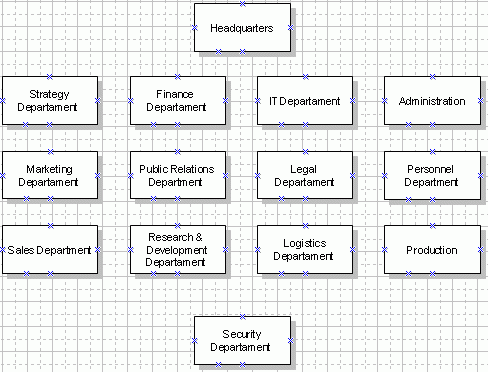
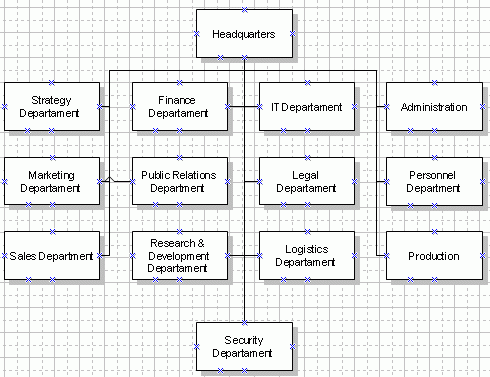
Lets draw an organization chart of a fictional company. The chart demonstrates how departments are related inside the company. The following departments exist: headquarters, strategy department, finance department, IT department, administration, marketing department, public relations department, legal department, personnel department, sales department, research and development department, logistics department, production department and security department.
The resulting chart will look as follows:
Let's start creating the chart.
We are going to use templates to speed up the work. In the File menu choose Template Gallery.The Template Gallery dialog will come up, where you can choose the needed template. Select the "Organization Charts" category in the left part of the dialog, and the "Organization Chart - simple" template.
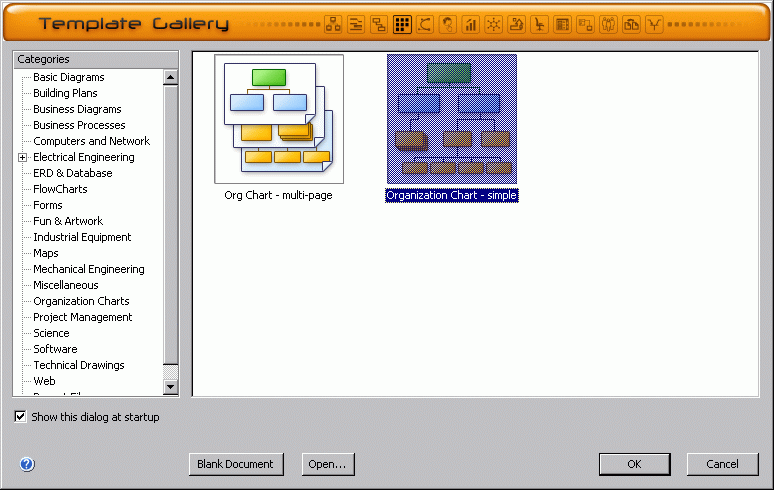
Click Ok. A new blank document will be opened.
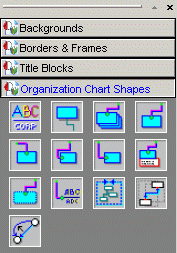 You will see the library window
with open libraries. We'll need the "Organization Chart" library.
Activate it by clicking on its title bar. You will see library shapes which
can be used for drawing an org chart.
You will see the library window
with open libraries. We'll need the "Organization Chart" library.
Activate it by clicking on its title bar. You will see library shapes which
can be used for drawing an org chart.
To place a library shape on the page, you may use 2 methods. You can either
drag a shape from the library with the mouse, and drop it on the page, or you
can use the Stamp tool. The second method is convenient when
you need to use the same library shape many times in the document. On the Drawing
Tools toolbar, select Stamp Tool  and select the needed shape in the library. Then click on the document page
where you want the shape to be inserted. The selected library shape will be
inserted where you clicked.
and select the needed shape in the library. Then click on the document page
where you want the shape to be inserted. The selected library shape will be
inserted where you clicked.
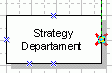
In the library, choose the shape with this icon:  and place it on the page as described above. Now you need to add text to the
shape. Select the shape in the document and type "Headquarters".
and place it on the page as described above. Now you need to add text to the
shape. Select the shape in the document and type "Headquarters".
Note: Library shapes and icons may vary a bit in different versions of the software.
Repeat this for all other departments.
In the result, you should get the following scheme:
Blue crosses mark the connection points. Connection points won't be visible
when printed or exported to a graphic file (same as the grid). If you don't
want to see connection points, you can hide them using the View / Connection
Points menu. To see how the document will look when printed, use the
Print Preview button  on the Main toolbar, or the corresponding command from the
File menu.
on the Main toolbar, or the corresponding command from the
File menu.
Now you need to establish relationship between the shapes. For this it's more convenient to see the connection points of shapes. If connection points are hidden, enable them from the View / Connection Points menu.
Now, on the Drawing Tools toolbar choose the Smart Connector
 .
.
Move the mouse pointer to the bottom connection point of the Headquarters shape. The connection point will be marked as a red cross.
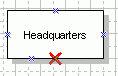
Click and hold the mouse button, and drag the mouse to the right connection point of the shape, that denotes the Strategy department.
. 
Release the mouse button.
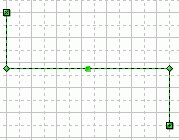 To adjust the connectors,
use their control handles, located in the points, where their legs meet, and
in the middle of the sides. When you reshape a connector, its legs will be added
or removed depending on its form.
To adjust the connectors,
use their control handles, located in the points, where their legs meet, and
in the middle of the sides. When you reshape a connector, its legs will be added
or removed depending on its form.
By manipulating the handles you can reshape the connectors as needed for your drawing.
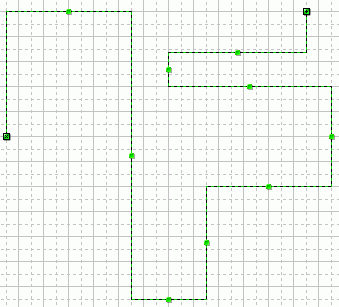
Connect all other shapes in the same way. Adjust the connectors so that they look as on the original chart.
The result must looks as follows:
For more information about the Template Gallery dialog see Dialogs - Modal Dialogs - Template Gallery, about the library window - see Windows - Library, about the Drawing Tools toolbar - see Toolbars - Drawing Tools, about the Main toolbar see Toolbars - Main, about connection points and connectors - see Shapes - Connecting Shapes.
Thanks to its powerful drawing capabilities ConceptDraw can be used by people, working in different fields: IT specialists, software developers, engineers, managers.
The product is recommended to managers, designers, network specialists, programmers and project managers, scientists.
You can use ConceptDraw to create all kinds of diagrams, database schemes, interface modelling, process schemes, organization charts, network diagrams, formulas and schemes of physical processes.
ConceptDraw comes with many library shapes for different tasks. There are libraries for org charts, medical libraries, electrical libraries, libraries for computer networks and software interfaces. The libraries contain ready-made shapes, which you can use in your drawings.
ConceptDraw supports a large number of popular graphic formats, allowing you to use it together with other applications.
It also allows you to create your own libraries, for your specific purposes.